We’ve all been stuck in a seemingly endless loop trying to find a time that works for a meeting. This is where Calendly comes in. Calendly saves you the time of going back and forth. You simply share your scheduling link of available time slots and the recipient can find a time that works best for their schedule. Cloze is integrated with Calendly to make it easy to share your Calendly scheduling link. You can simply connect Calendly to Cloze to make sharing your scheduling link fast and easy.
With your calendar connected to Cloze, every meeting is automatically logged to the timeline of the attendees and you’ll see your meetings on the Cloze Agenda.
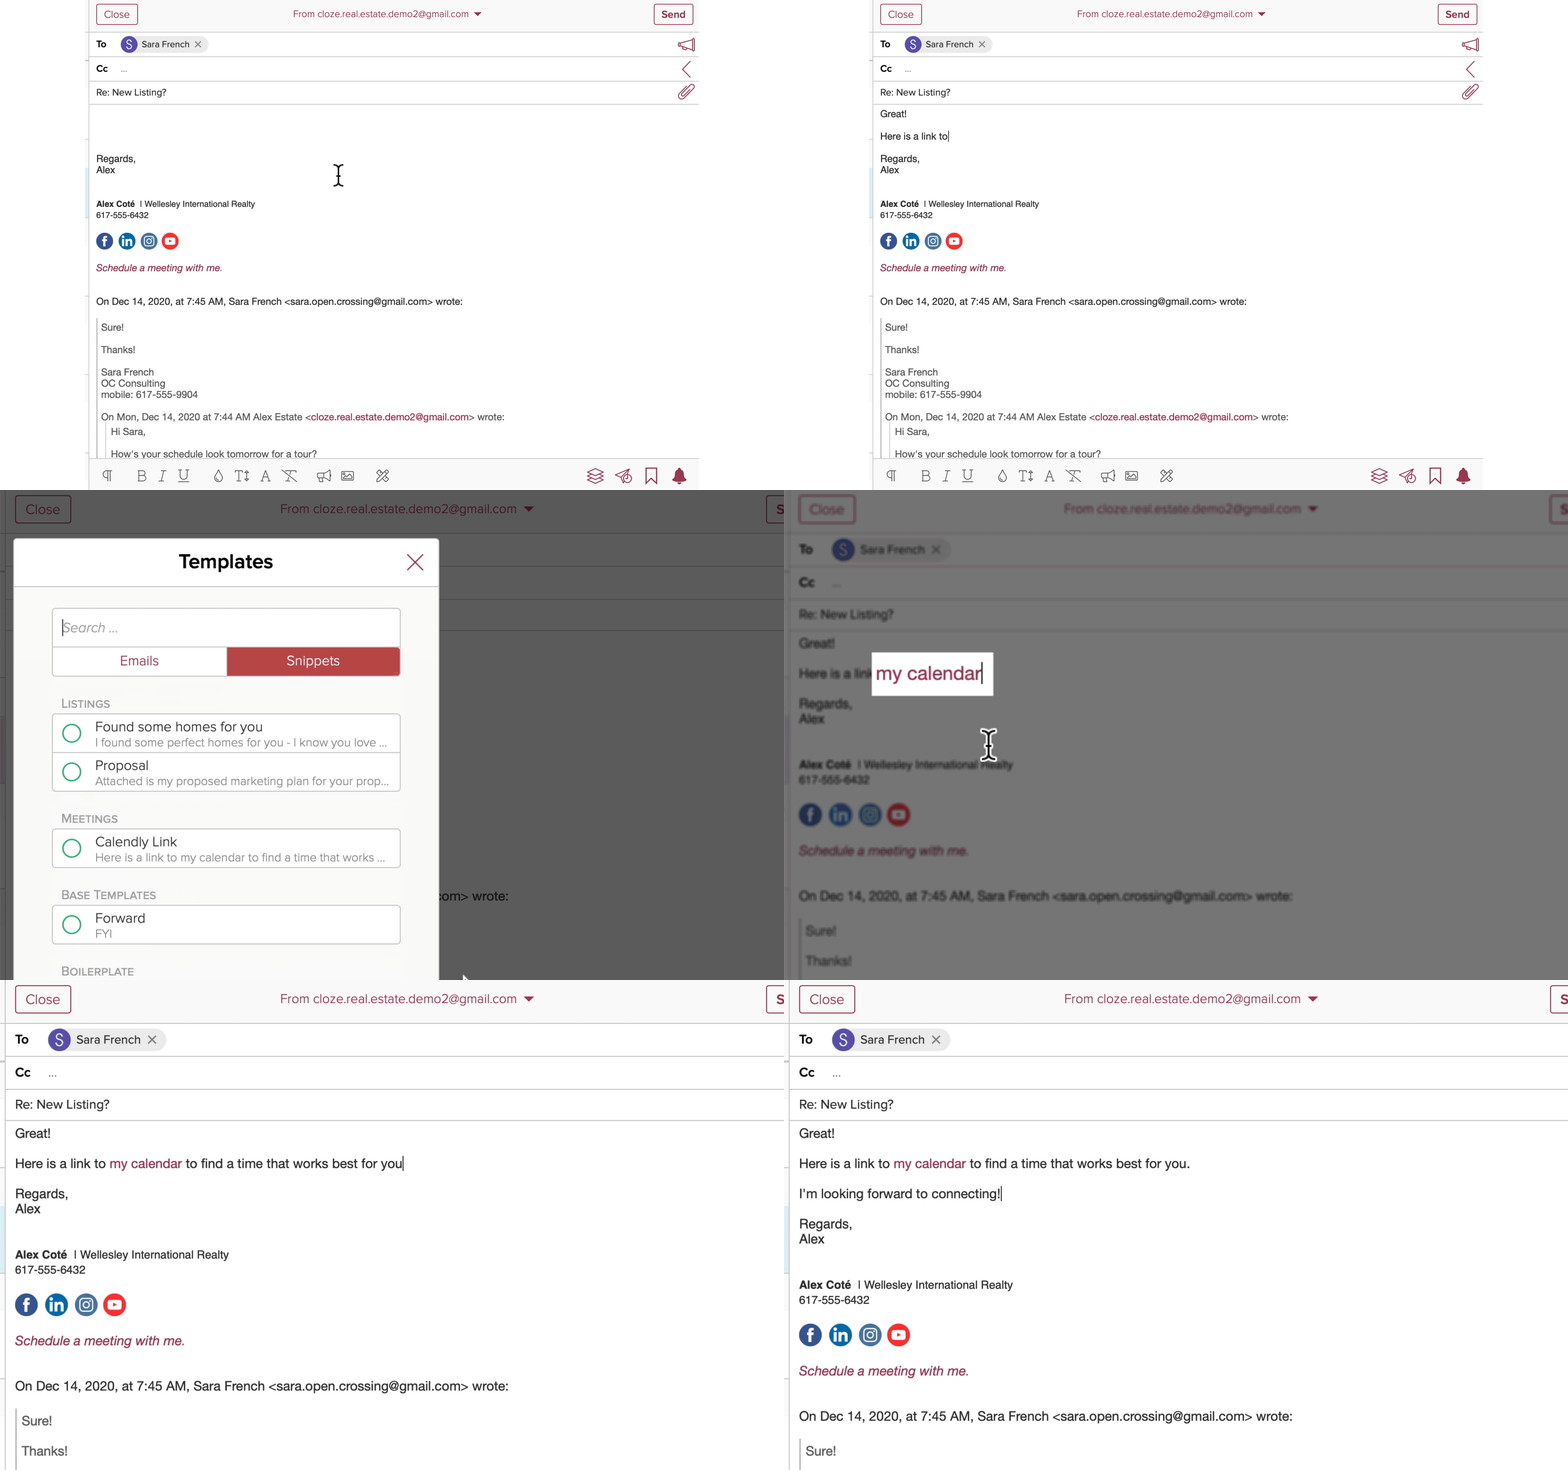
When you connect Calendly to Cloze it is easy to add your scheduling link while replying to emails, to Cloze templates, and to your Cloze email signature.
The Calendly integration is included with all premium, paid Cloze plans.
Use a Smart Link Snippet for Calendly meeting booking
Once connected, you’ll see a new Smart Link Snippet in Cloze for Calendly meeting booking. You can add this snippet into your signature or into templates.
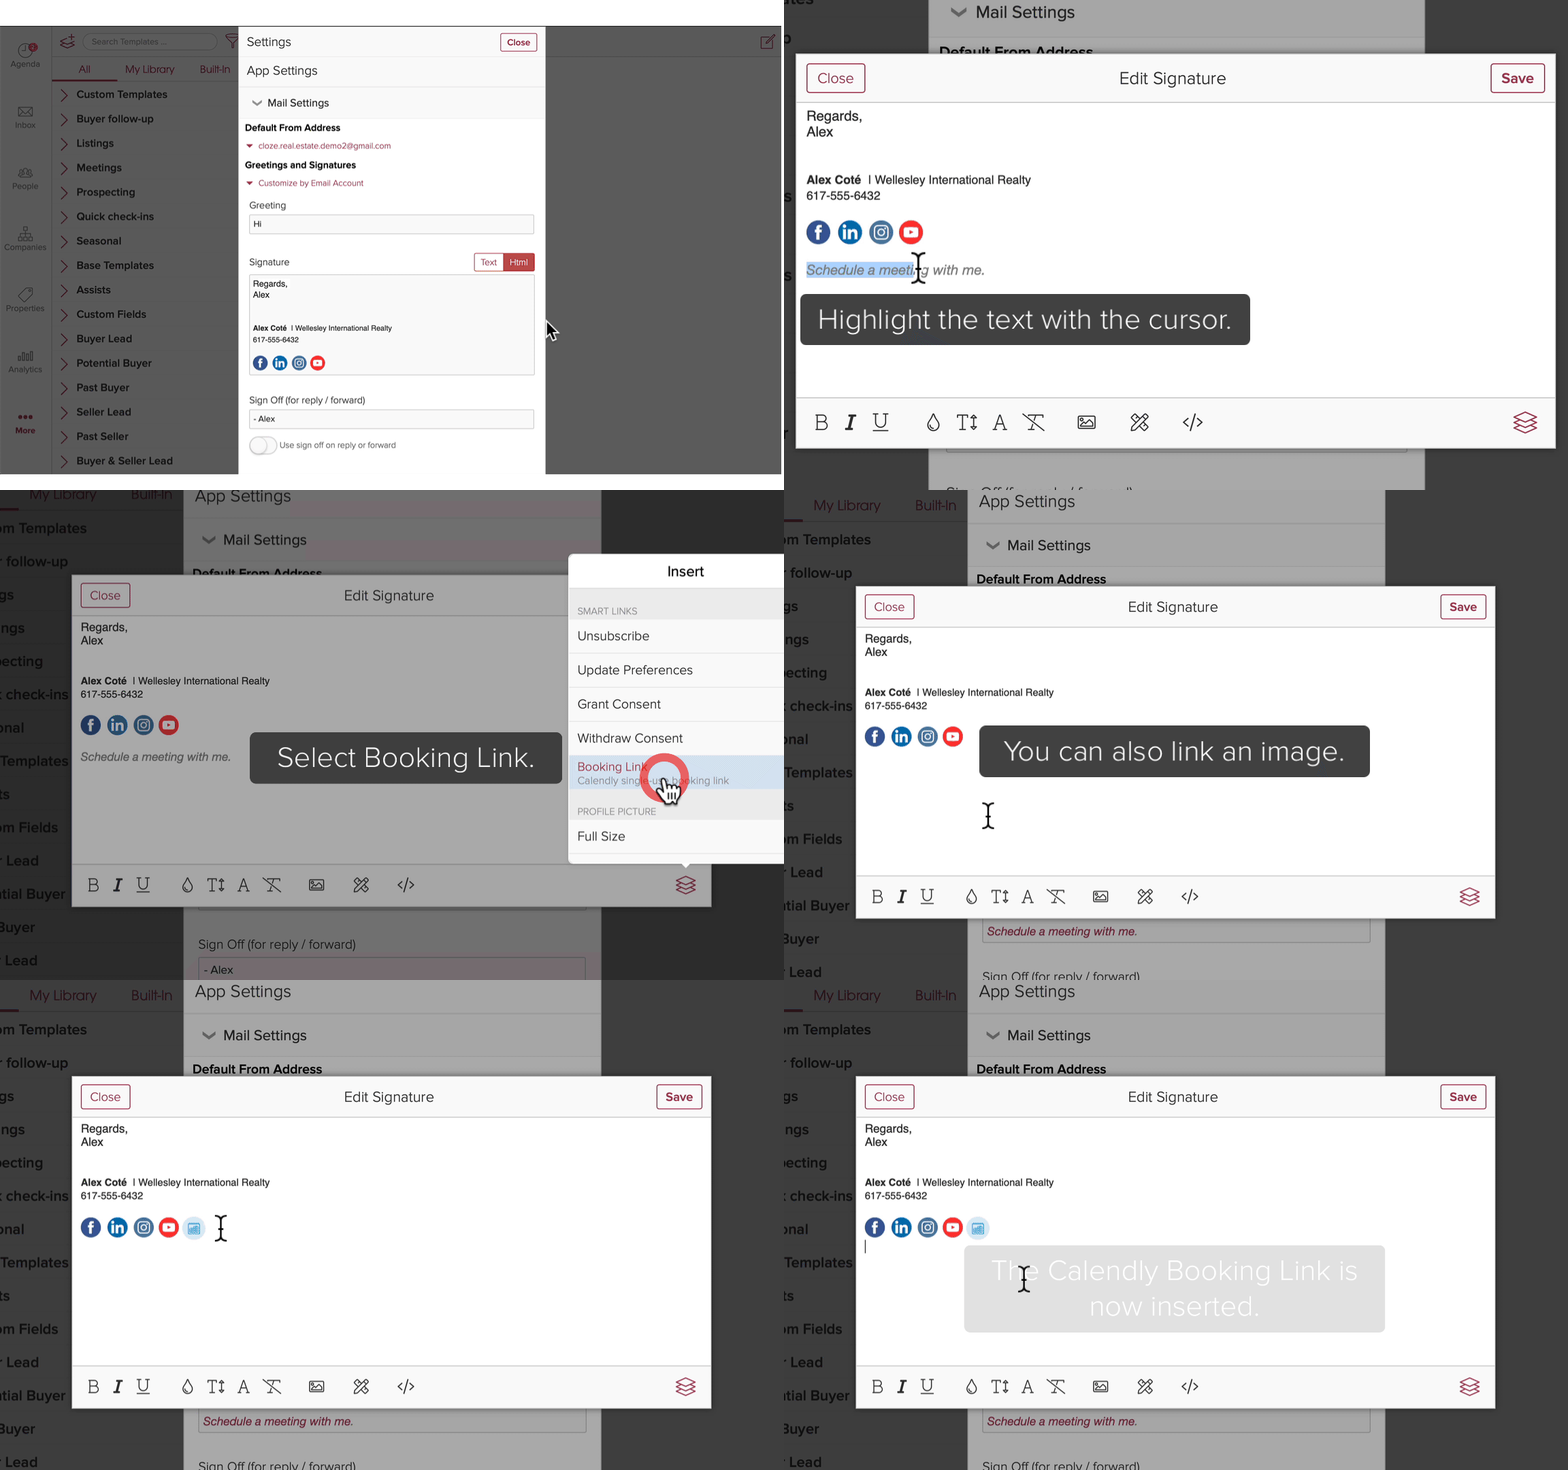
Add Calendly to your email signature
You can add Calendly to your email signature in Cloze so every email you send includes the Calendly scheduling link.
Add Calendly to an email template
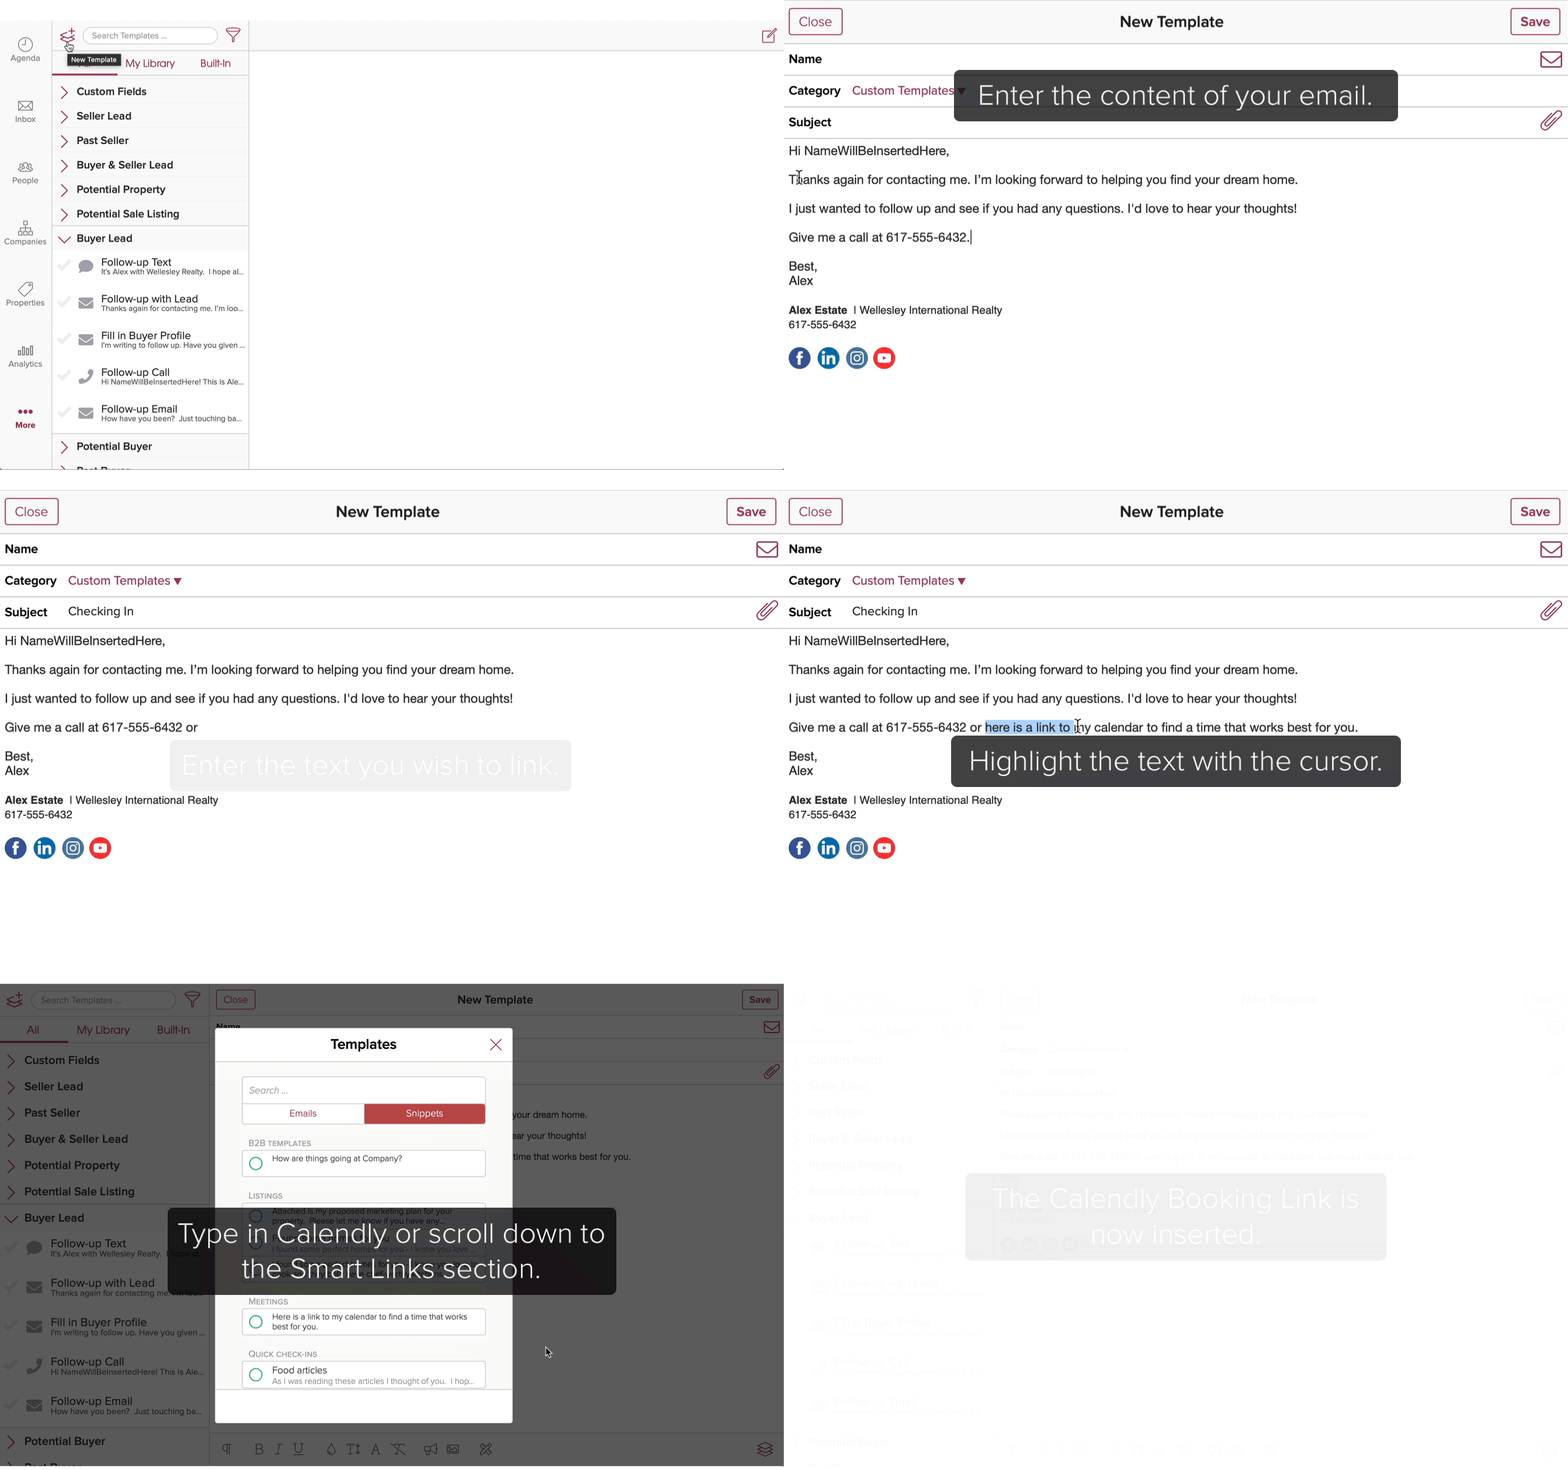
It is also helpful to add your Calendly scheduling link to email templates in the Cloze template library. This makes it easy to follow-up on emails and suggest a meeting simply by using a new template or snippet that includes your booking link.
Calendly offers best practices and some template examples on their blog for sharing your scheduling link.
Cloze automatically creates single-use Calendly booking links
When the Calendly Smart Link is used in a Cloze email (or included in your signature) it gets converted into a unique single-use Calendly booking link. This can be helpful in scenarios where you may want to limit access to your schedule.
For example, if you add the Calendly booking link to your signature, every email you send has a different single-use Calendly link in your signature.
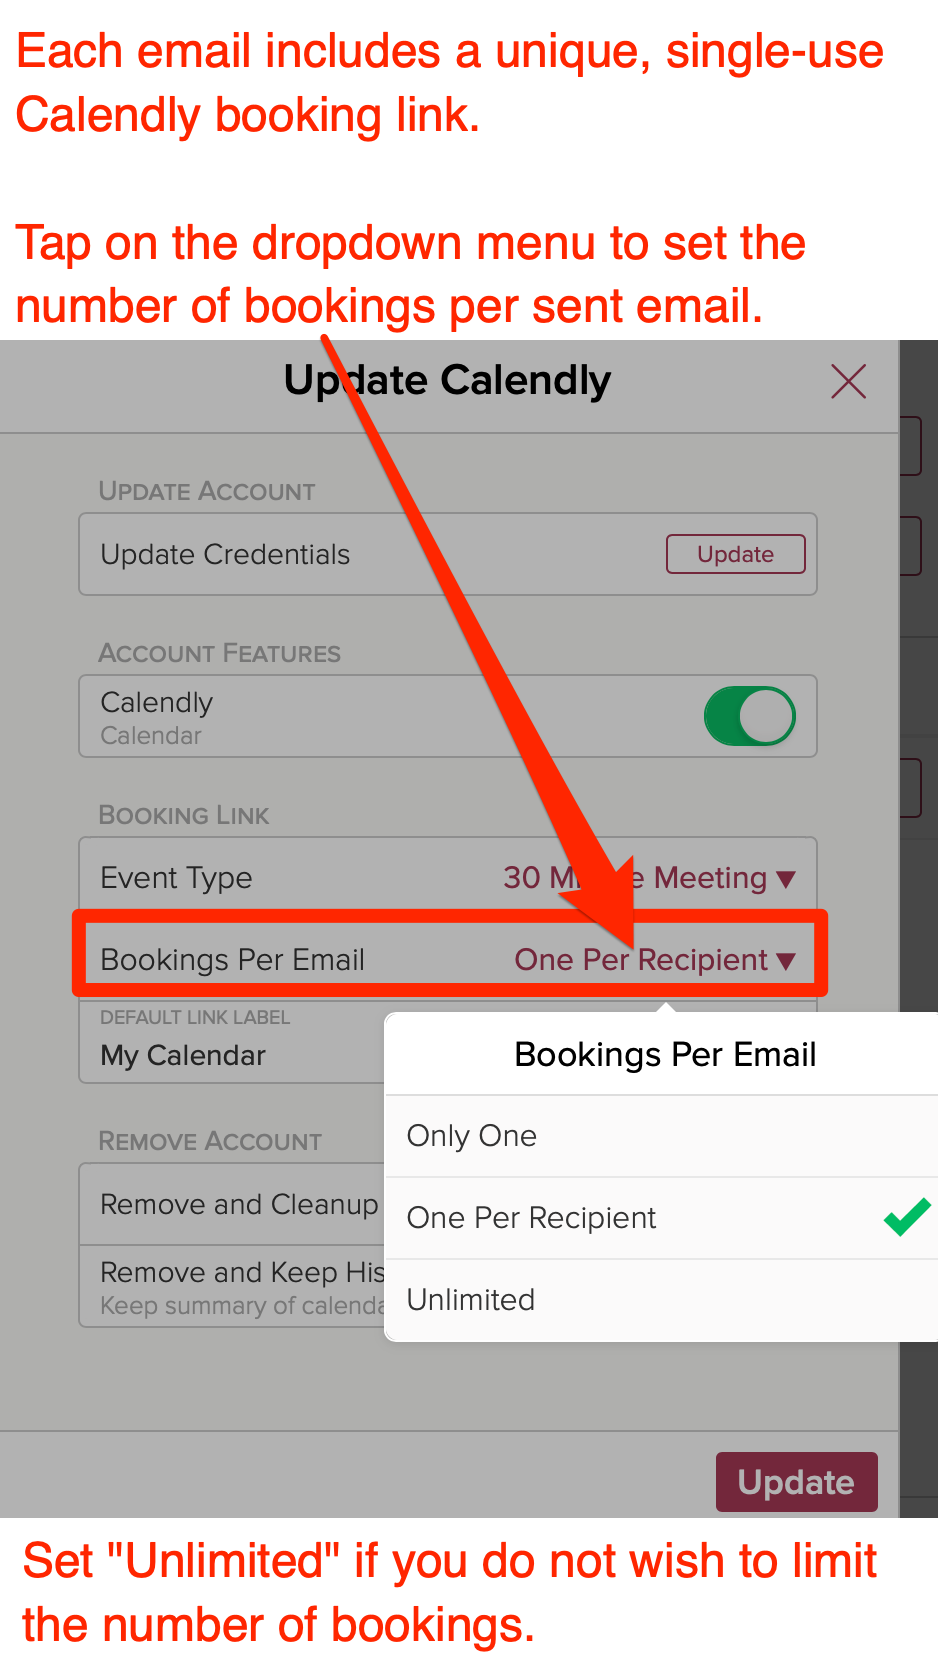
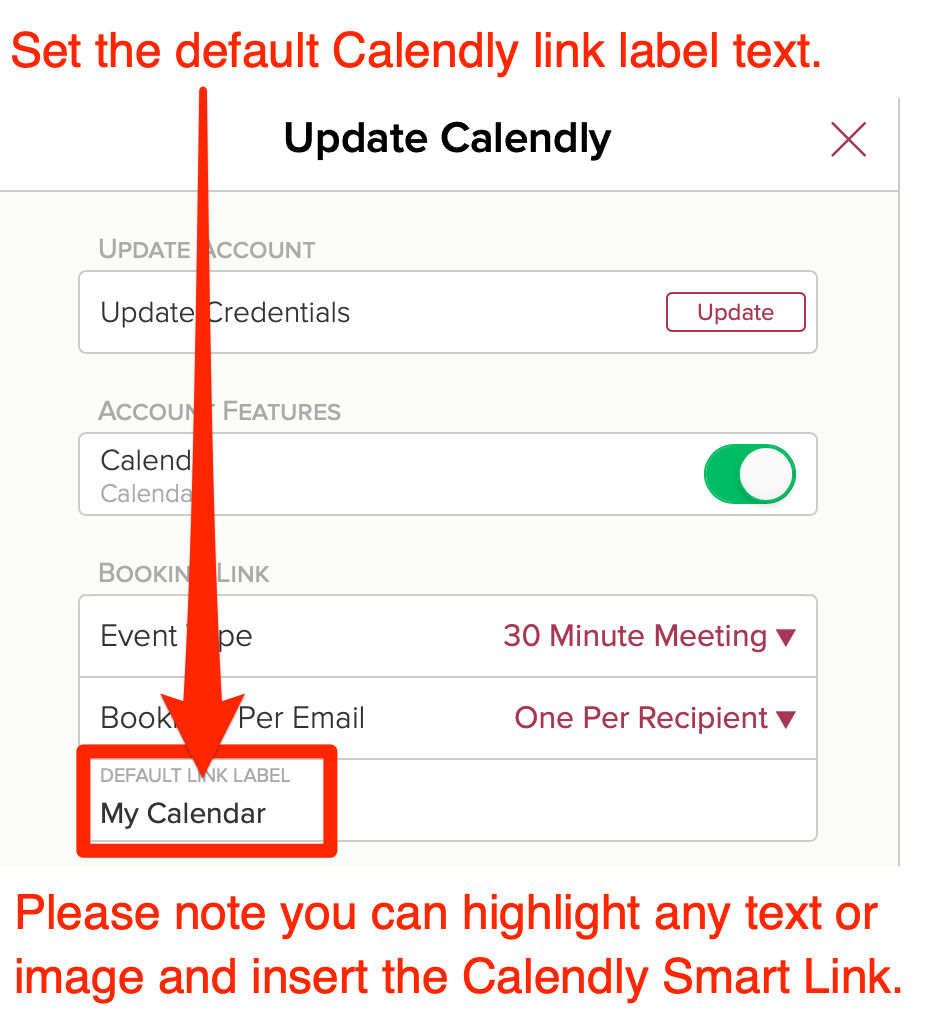
In Calendly settings, you can adjust which Event Type is used for the Smart Link, and how many times the link can be used. You can also set the default text for the Smart Link uses at the time you insert it into an email, template, or signature.
Create templates for your team that use Calendly booking links
When everyone on your team connects their Calendly account to Cloze, you can share templates across your team and whoever sends the template has a link to their calendar automatically inserted.
You can centrally create and manage a single template and Cloze will smartly insert single-use booking links so the meeting is always booked with the right team member.
Getting Started:
Connect Calendly to Cloze
To connect your Calendly account to Cloze please follow the instructions below.
1.) Tap on More (…) in the lower right of your screen on mobile (iOS/Android) and lower left on cloze.com.


2.) Tap on Settings.

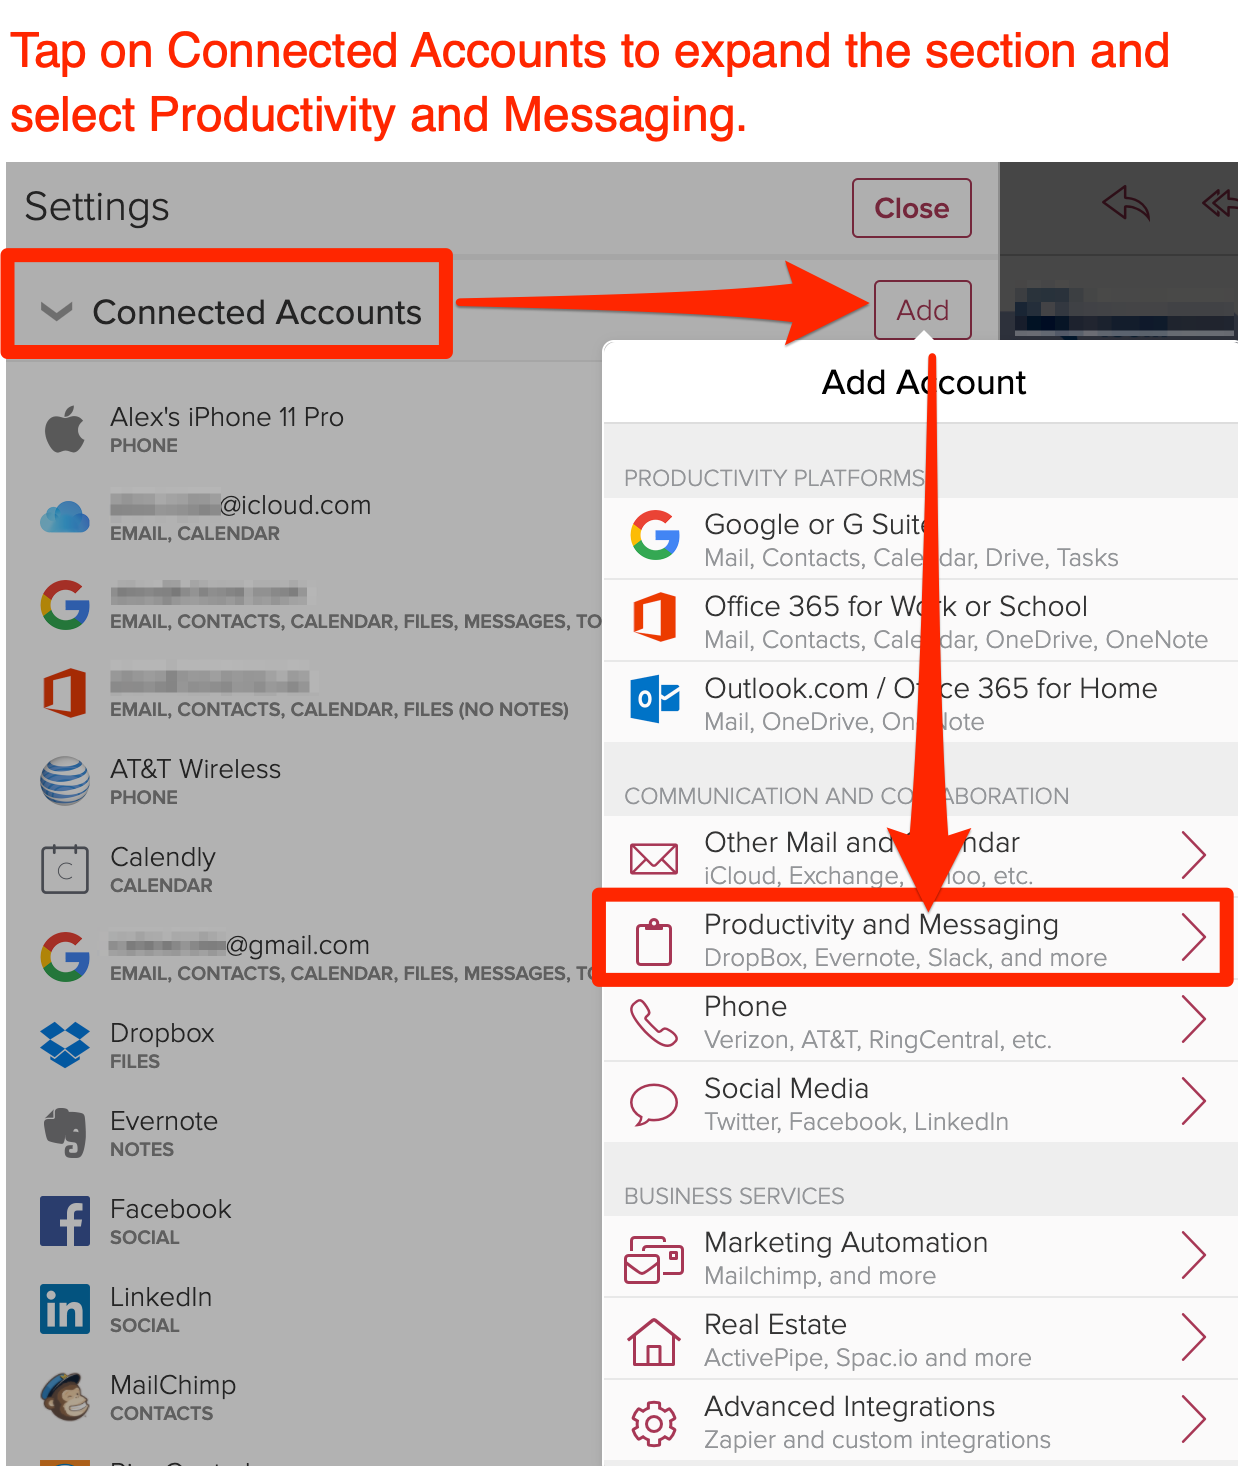
3.) Tap on Connected Accounts to expand the section and select Productivity and Messaging.
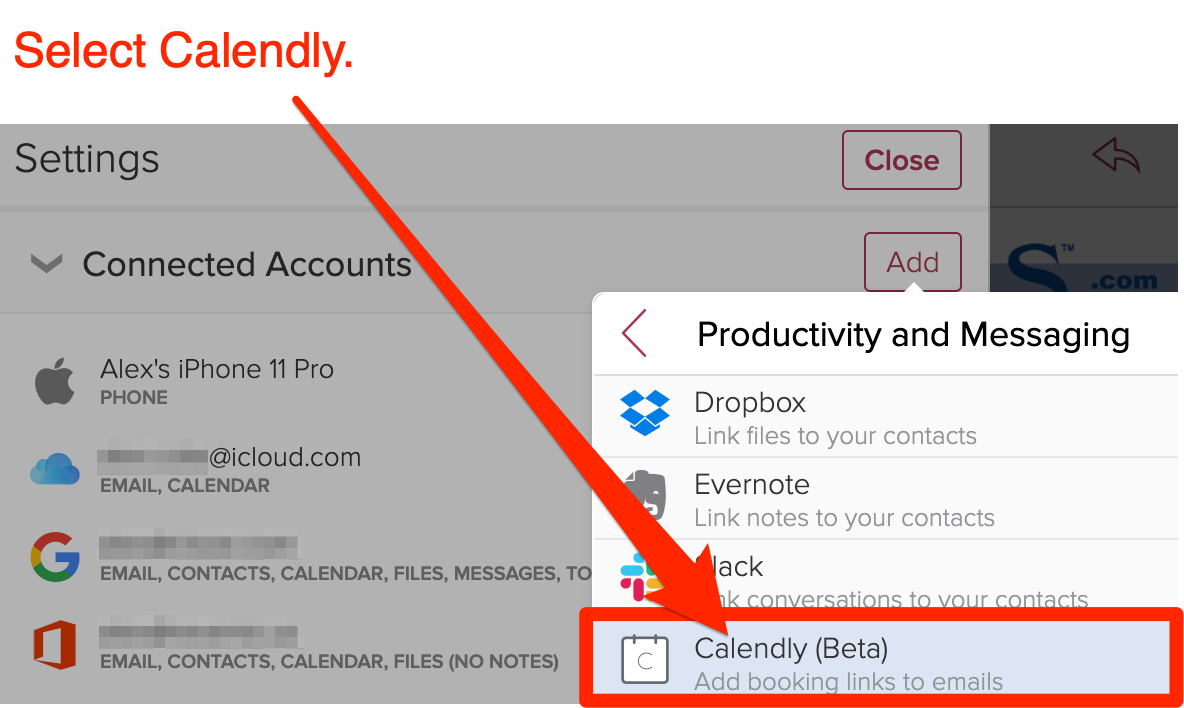
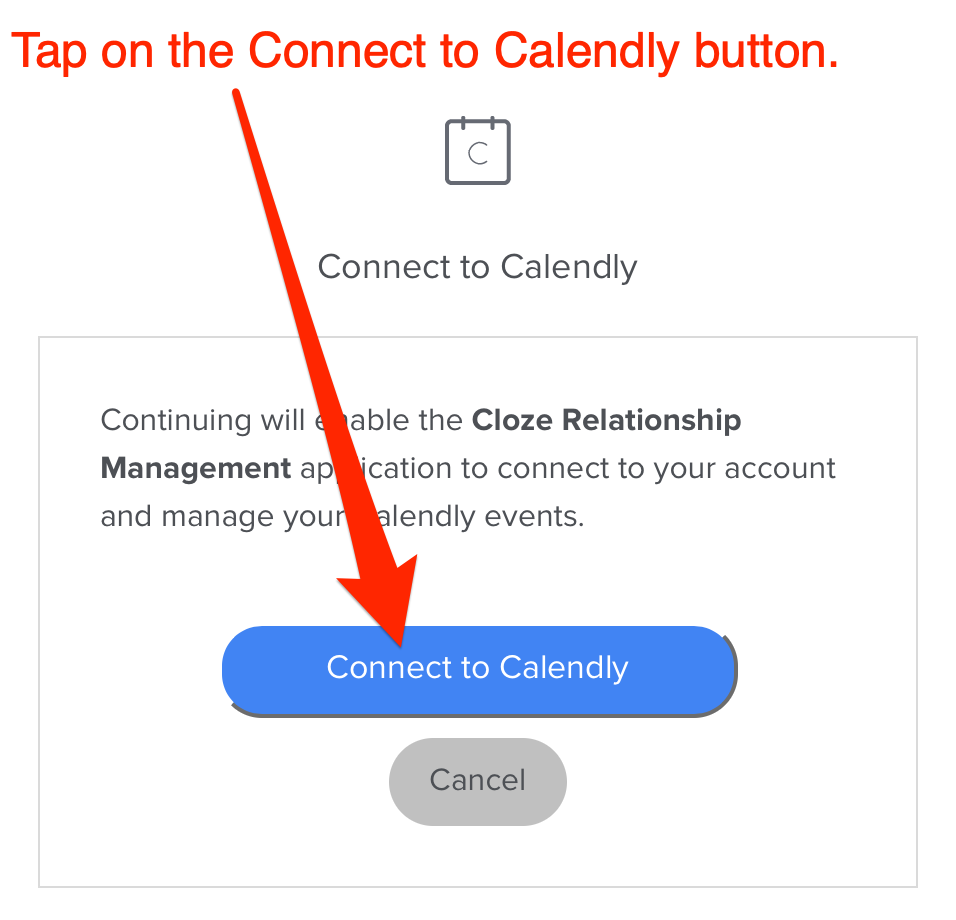
Tap on the “Connect to Calendly” button to connect your Calendly account to Cloze:
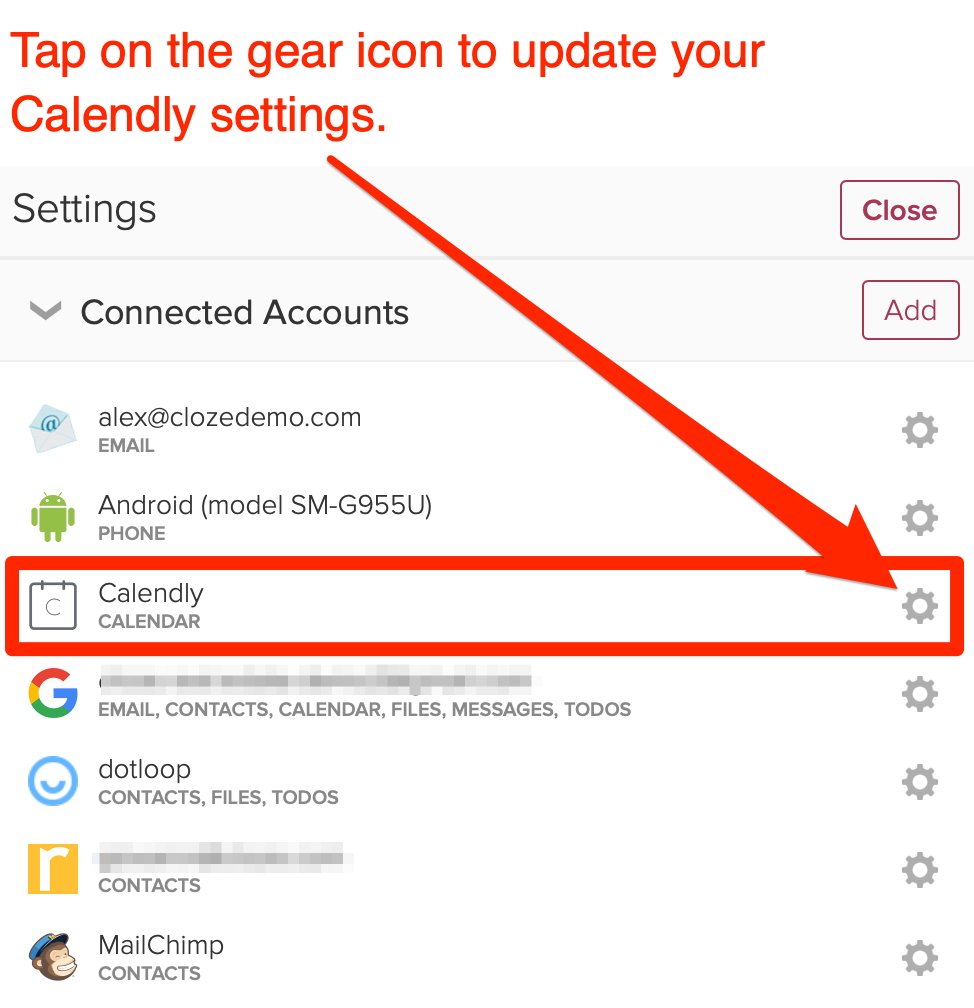
4.) Tap on the gear icon button next to Calendly to set your default Event Type.
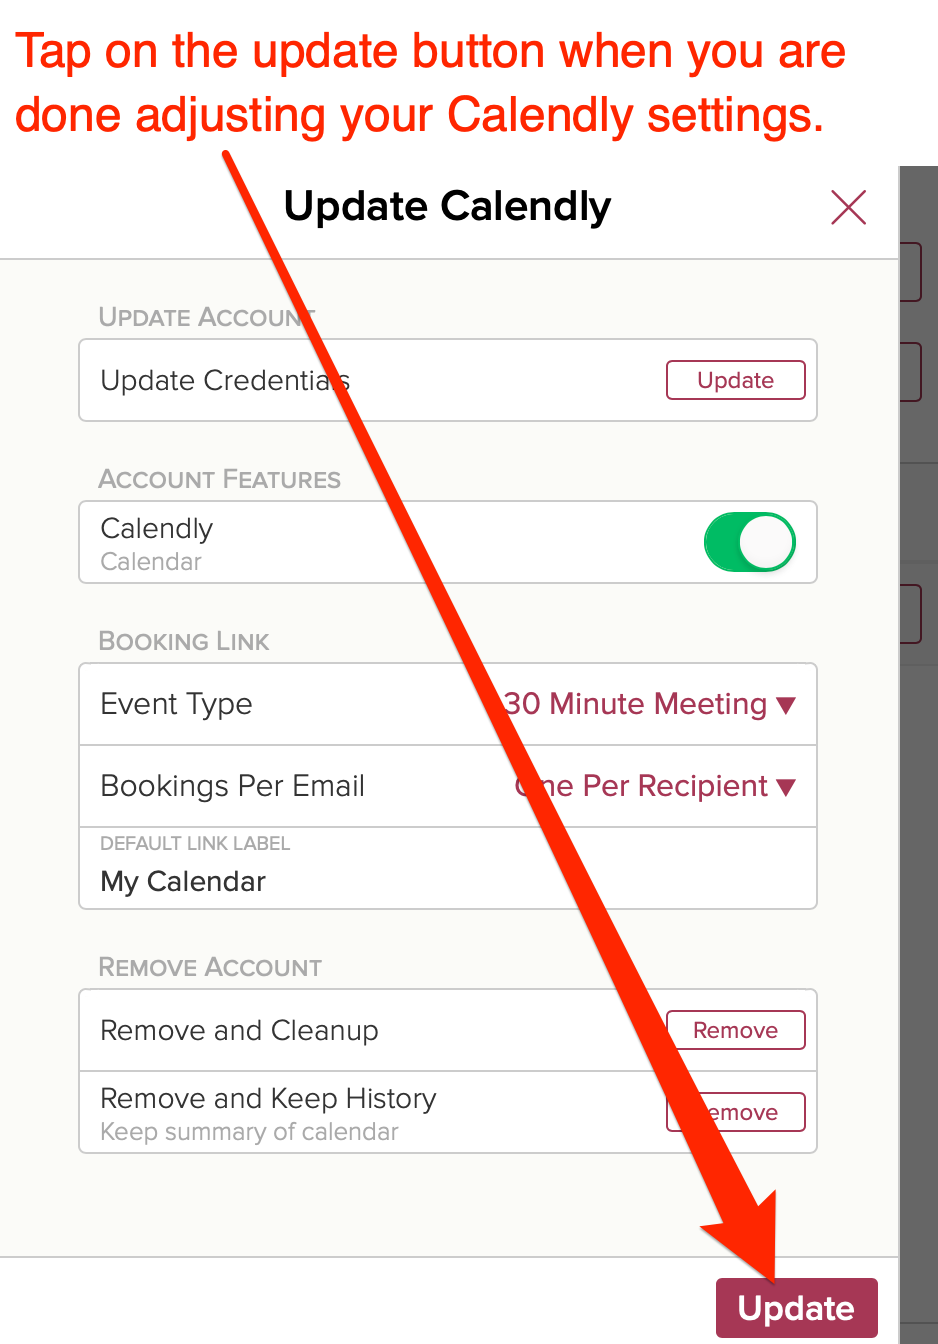
5.) Adjust your Calendly settings as needed.
In Calendly settings, you can adjust your default Event Type, the number of bookings allowed per email, and the default Smart Link Snippet label text.
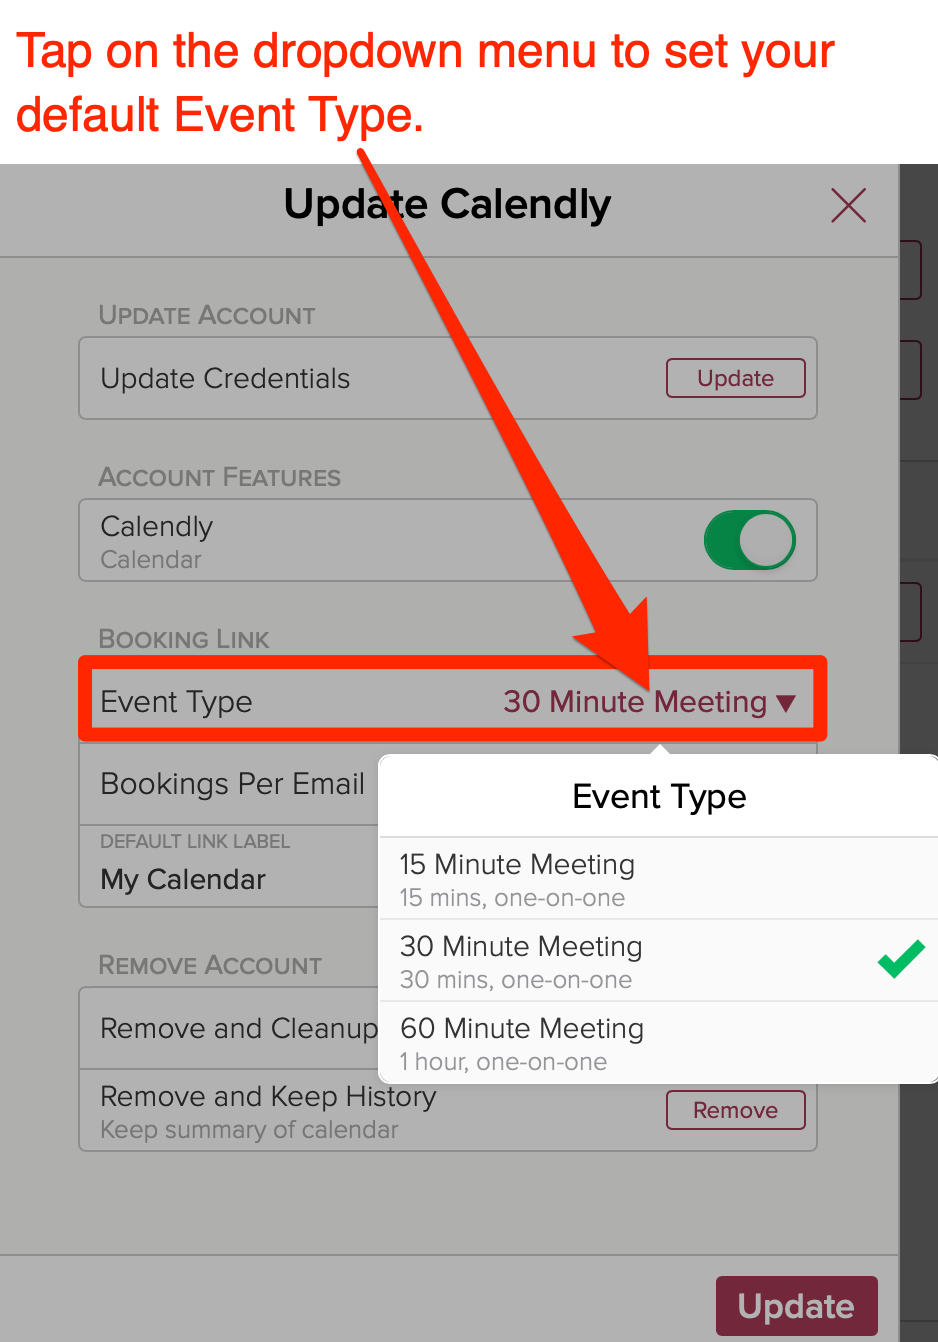
You can adjust the number of bookings per email.
And set the default scheduling link text. For example, you may wish to make it lower case if you expect to routinely insert the booking link in the middle of a sentence. You can also highlight any text or image in Cloze and set your booking link.
6.) Tap on the Update button when you have finished adjusting your Calendly settings.
